
Volcanoes have captivated human imagination and curiosity for centuries. These magnificent natural wonders, with their fiery eruptions and raw power, evoke a mixture of awe and fascination within us.
From ancient mythology to modern scientific studies, volcanoes have left an indelible mark on our collective consciousness. The allure of volcanoes lies in their ability to shape landscapes, influence climates, and even impact civilizations.
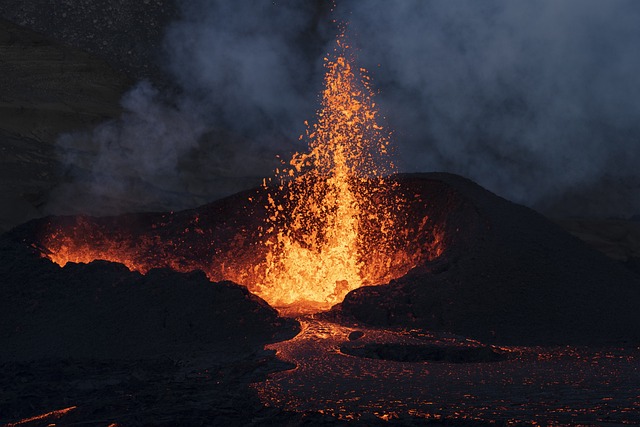
They are both destructive forces of nature and sources of incredible beauty. The sight of molten lava flowing down the slopes or explosive eruptions spewing ash into the sky leaves a lasting impression on anyone fortunate enough to witness it.
The fascination with volcanoes
Volcanoes hold a special place in our hearts because they embody the raw power and unpredictable nature of our planet. We marvel at their ability to transform barren landscapes into fertile grounds teeming with life.
Volcanic eruptions remind us that we live on an ever-changing planet where geological forces continue to shape the world around us. Beyond their scientific significance, volcanoes also possess a certain mystique that captures our imagination.
They have been associated with gods and goddesses in various mythologies across different cultures throughout history. From Pele, the Hawaiian goddess of fire, to Vulcan, the Roman god of fire and craftsmanship, these mythical beings personify the awe-inspiring energy that volcanoes exude.
Why create your own volcano?
Building your own volcano model is not just an entertaining pastime; it is also a fantastic educational experience for both children and adults alike. By crafting your miniature volcanic masterpiece, you can gain a deeper understanding of how these geological phenomena work. Creating your own volcano allows you to explore the various components that make up this natural wonder: from its distinct shape and structure to the mechanisms behind volcanic eruptions.
It provides a hands-on opportunity to learn about the different types of volcanoes, their characteristics, and the forces that drive their explosive power. Moreover, constructing a volcano model can be a creative outlet that combines science with artistry.
You have the freedom to design your own volcanic landscape, adding realistic details that bring your creation to life. This process encourages imagination and fosters a deeper appreciation for the complexity and beauty of our natural world.
Understanding the Basics
What is a volcano?
A volcano is a geological formation that occurs when hot molten rock, debris, and gases escape from beneath the Earth’s crust and erupt onto the surface. This eruption creates a vent or opening through which volcanic material can flow or be expelled into the air.
Volcanoes are often found near tectonic plate boundaries, where the Earth’s crust is thin and prone to movement. They can be found both on land and underwater, forming majestic mountains or creating islands in vast oceans.
Types of volcanoes and their characteristics
There are several types of volcanoes, each with its own distinct characteristics:
Shield volcanoes – gentle giants
Shield volcanoes are named for their shape, which resembles an inverted warrior’s shield. These volcanoes have broad slopes that gradually rise from their base and taper towards the summit.
They are typically formed by fluid lava flows that spread out over large areas before solidifying. Shield volcanoes tend to produce non-explosive eruptions due to the low viscosity of their lava, allowing it to flow easily over greater distances.
Composite volcanoes – explosive beauties
Composite volcanoes, also known as stratovolcanoes, are famous for their picturesque conical shape. They are built up by alternating layers of ash, lava flows, and pyroclastic materials (volcanic debris).
Composite volcanoes often experience explosive eruptions due to the high viscosity of their lava. These eruptions can result in ash clouds reaching high into the atmosphere and pyroclastic flows rushing down the slopes at high speeds.
Cinder cones – small but mighty
Cinder cones are smaller volcanic formations characterized by steep sides and a bowl-shaped crater at their summit. These cones form when gas-rich magma is ejected into the air, shattering into small fragments called cinders as it solidifies mid-air. The cinders fall back to the ground and accumulate around the vent, forming a cone-shaped structure.
Cinder cones tend to have short-lived eruptions but can still be powerful and explosive, dispersing ash and lava bombs in their vicinity. Understanding the basics of what defines a volcano and the different types that exist lays a solid foundation for embarking on your journey to create your own volcanic masterpiece.
Gathering Your Supplies
Materials needed for building a volcano model
When it comes to constructing your very own volcano model, there are a few essential materials you’ll need to gather. The first decision you’ll need to make is what type of base material you want to use.
There are three popular options: cardboard, paper mache, or clay. Cardboard is a great choice if you’re looking for something sturdy and readily available.
It’s easy to shape and provides a solid foundation for your volcano. Paper mache, on the other hand, offers more flexibility as it can be molded into any shape you desire.
It also dries relatively quickly and gives your model a realistic texture once painted. Clay provides excellent durability and allows for intricate details in your design.
Decorative elements: paint, rocks, vegetation
Once you’ve chosen the base material for your volcano model, it’s time to think about adding some decorative elements that will bring it to life. Paint is an essential tool in this process as it helps create the illusion of different rock layers and adds depth to your model.
Choose earthy tones like brown, gray, or black for a natural look or get creative with vibrant colors if you prefer a more artistic representation. To make your volcano even more realistic, consider incorporating rocks into the design.
You can use small pebbles or gravel as volcanic debris around the base of the mountain or strategically place larger rocks to resemble boulders on its slopes. Adding vegetation adds another layer of authenticity to your model by mimicking real volcanic landscapes where life often finds its way through harsh conditions.
Use small artificial trees or shrubs that blend well with the color scheme of your painted volcano. With these materials in hand – whether it’s cardboard or clay as the base material along with paint for texture and color variation – plus rocks and vegetation for added realism, you’ll have everything you need to create an impressive volcano model that will surely captivate your audience.
Designing Your Volcano Model
Choosing the right shape and size for your volcano base
When it comes to designing your volcano model, the first thing to consider is the shape and size of your volcano base. You want to ensure that your base is sturdy enough to support the weight of your masterpiece. A common choice for a volcano base is using cardboard as it provides both strength and flexibility.
Start by cutting out a circular or conical shape from the cardboard, depending on the type of volcano you want to create. Next, think about the size of your volcano.
Are you envisioning a towering mountain or a smaller hill? Consider factors like available space and how much lava (or other eruption materials) you want to include.
Remember, bigger isn’t always better! It’s essential to strike a balance between realism and practicality.
Adding realistic details to enhance the model’s appearance
To make your volcano model truly captivating, it’s important to add realistic details that enhance its appearance. One way to achieve this is by using paint in various shades of brown, gray, and black to mimic natural volcanic rock colors.
Apply darker shades at the base with gradual transitions into lighter tones as you move upward. Additionally, incorporating different textures can make your volcano look more authentic.
Consider using crumpled tissue paper or clay mixed with sand for creating rough surfaces resembling volcanic rocks. By adding layers with varying textures, you’ll capture the ruggedness and complexity seen in real volcanoes.
Mimicking different types of volcanic landscapes
Creating an accurate representation of different types of volcanic landscapes adds depth and realism to your model. Let’s explore three key elements: lava flows and channels, craters and calderas, as well as fumaroles and vents. a) Lava flows are streams of molten rock that cascade down the sides of a volcano.
To simulate this effect, you can use red and orange-colored tissue paper or paint to create flowing patterns from the summit of your volcano down towards the base. b) Craters and calderas are depressions found at the top of volcanoes.
You can carve out a concave shape at the summit of your volcano to represent a crater. For larger composite volcanoes, consider a wider and more shallow depression resembling a caldera.
c) Fumaroles and vents are openings through which volcanic gases escape. You can create these by shaping small holes around your volcano’s surface.
Use hot glue or modeling clay to add depth, making them look like fissures or cracks where gases might emerge. By incorporating these details, you’ll bring your volcano model to life, capturing the essence of different volcanic landscapes that exist in nature.
Creating the Eruption Effect
Selecting eruption methods based on safety and desired effect
When it comes to creating the eruption effect for your volcano model, it’s important to consider both safety and the desired visual impact. There are a few popular methods you can choose from, each with its own unique characteristics.
One of the most common methods involves using household ingredients like baking soda and vinegar to create a chemical reaction that mimics volcanic eruptions. This method is safe, easy to control, and provides a satisfying eruption effect.
Chemical eruptions using baking soda and vinegar
Chemical eruptions using baking soda and vinegar are a classic choice for creating an eruption effect in your volcano model. The key ingredients needed for this method are readily available in most kitchens, making it convenient for everyone. To get started, you’ll need to create a mixture by combining baking soda with vinegar.
The reaction between these two ingredients produces carbon dioxide gas, which creates the eruption effect. a) Controlling the eruption intensity with ingredient ratios: The amount of baking soda and vinegar used will determine the intensity of your volcano’s eruption.
If you want a more explosive eruption, increase the ratio of baking soda to vinegar. For a gentler flow of lava, decrease the ratio.
b) Enhancing visual effects with food coloring or dish soap: To make your volcano model even more visually appealing during its eruption, consider adding some food coloring or dish soap into the mixture. Food coloring can give your lava a realistic red or orange hue while dish soap will create frothy bubbles resembling volcanic ash.
Mentos-Diet Coke eruptions: an explosive alternative
For those looking for a more explosive alternative to chemical reactions like baking soda and vinegar, Mentos-Diet Coke eruptions offer an exhilarating option. This method involves dropping Mentos candies into a bottle of Diet Coke, causing an explosive reaction that shoots out a powerful jet of soda.
To perform this eruption, prepare your volcano model as usual and then carefully drop several Mentos candies into an open bottle of Diet Coke. The carbon dioxide in the soda reacts with the rough surface of the Mentos, resulting in a rapid release of carbon dioxide bubbles.
The pressure builds up quickly and creates a dramatic eruption effect that can shoot several feet into the air. Remember to exercise caution when attempting this method as the eruptions can be quite forceful.
Ensure you have ample space and protective gear to avoid any unwanted accidents. By selecting your eruption method based on safety considerations and desired visual effects, you can create an exciting eruption for your volcano model that will leave viewers in awe.
Whether you choose chemical reactions using baking soda and vinegar or opt for the explosive Mentos-Diet Coke eruptions, both options offer their own unique experiences. So, get ready to witness the power of volcanoes firsthand through these thrilling eruption effects!
Taking Safety Precautions
Understanding potential hazards during volcanic eruptions
When creating your own volcano, it’s crucial to understand the potential hazards that come with volcanic eruptions. While our miniature versions may not pose the same risks as real volcanoes, it’s important to be aware of the dangers and take appropriate precautions. During eruptions, volcanoes release various hazardous materials into the air and create challenging conditions for both humans and the environment.
One of the most significant risks during a volcanic eruption is the release of harmful gases. Volcanoes emit substances like sulfur dioxide, carbon dioxide, hydrogen sulfide, and others that can be extremely toxic if inhaled in large quantities.
These gases can cause respiratory issues, eye irritation, throat irritation, and even more severe health problems in some cases. Therefore, it’s essential to ensure proper ventilation when conducting an eruption experiment indoors or perform it in a well-ventilated outdoor area.
Protecting yourself from harmful gases
To protect yourself from harmful gases released during a volcanic eruption experiment, there are a few precautions you can take. Firstly, always conduct your experiment in a well-ventilated area.
This means choosing an outdoor location whenever possible or ensuring that windows are open and fans are running if you’re indoors. If you’re working with young children or have respiratory sensitivities yourself, consider wearing protective masks designed to filter out harmful particles and gases.
These masks can provide an extra layer of protection against inhalation of any potentially dangerous fumes. Additionally, it’s vital to limit exposure time near your erupting volcano model.
While observing the impressive spectacle is undoubtedly exciting, remember that extended exposure could increase your risk of inhaling harmful gases. It’s best to keep a safe distance and limit close contact until any lingering fumes have dissipated.
Avoiding contact with hot lava or ash
Another safety precaution to keep in mind while creating your volcano is avoiding contact with hot lava or ash. While our volcanic models can’t produce real lava, it’s still essential to be cautious. Avoid touching the erupting material or any residue left after the eruption.
Even though it won’t burn you like actual lava, it might still be hot enough to cause discomfort or skin irritation. Let the volcanic material cool down completely before attempting to clean up or touch anything around it.
In addition to avoiding physical contact with lava-like substances, be wary of volcanic ash. During eruptions, volcanoes can release a significant amount of fine particles into the air, known as ash.
This ash can become airborne and spread over a considerable distance. If you’re conducting your experiment outdoors and notice the presence of ash in the air, consider wearing protective goggles and covering your nose and mouth with a cloth to avoid inhaling any particles.
Remember, safety should always be a top priority when conducting science experiments involving volatile elements like volcanoes. By understanding potential hazards such as harmful gases and hot materials, you can ensure an enjoyable and risk-free experience while exploring this fascinating natural phenomenon.
Enhancing Your Volcano Experience
Creating a volcanic soundscape
To truly immerse yourself in the volcano experience, why not add some ambient sounds that mimic the rumblings and hissing of a real volcano? Imagine the satisfaction of watching your volcano model erupt while hearing the low, ominous growl that echoes through a volcanic crater. You can easily create a volcanic soundscape by using online sound effects or even recording your own.
Look for sounds like deep rumbles, sizzling lava, and crackling rocks to add an extra layer of excitement to your eruption. Play the sounds in the background as you trigger your eruption, and you’ll feel like you’re standing at the edge of a real-life volcano!
Designing an interactive experience
Why stop at just watching your volcano erupt when you can make it an interactive experience? Get creative and think about ways to engage with your volcano model beyond just triggering eruptions. You could design a mini-hike around the base with tiny figurines exploring the surrounding landscape, or build miniature villages that reflect how people have adapted to living near volcanoes throughout history.
Consider adding educational elements such as informative signs or diagrams that explain different parts of a volcano’s structure. By making your volcano model interactive, you’re not only creating something visually captivating but also fostering curiosity and learning.
Conclusion
Creating your first volcano model is not only an enjoyable activity but also an opportunity for learning and creativity. By understanding the basics of volcanoes and gathering the necessary supplies, you can design a realistic-looking model that will impress both yourself and others.
Adding elements like a volcanic soundscape and incorporating interactivity will take your experience to another level entirely. So go ahead, give it a try!
Build your first volcano model today and embark on an exciting journey into the fascinating world of volcanoes. Remember, the only limit is your imagination!